Wednesday, December 22, 2010

Kid's Stuff

These were fun toddler crafts.

The fish is stuffed with newspaper, stapled shut, and sprinkled with mashed Cornflakes.

I loved this idea, but would use sturdier paper next time, maybe even cardboard. The licorice is just taped on the back, but hot glue would work best.

Wednesday, December 15, 2010

Nativity Sign

I've been seeing a lot of sillouhette nativity scenes recently, and completely fell in love. I kept thinking they were pretty - and then I thought "Oh! That would make it so incredibly easier!"

 And it did. This may be my favorite sign so far. I especially like the way the stable scene seems to light up when the light hits it at night. Merry Christmas!


Wednesday, December 8, 2010

A Fall Sign

I wanted to do a sign for fall, but I wanted one that could last all season, even through Halloween and Thanksgiving, so I decided to go with pumpkins instead of say, "Welcome Fall" or a turkey.


Turns out, I am not so great at painting circles. This sign did not turn out the way I was envisioning, but I wound up liking it ok anyway. For the "leaves" (that don't look like leaves... the pumpkins were supposed to be nestled in a pile of leaves... yeah...) I cut little stamps out of foam and just squished them on over and over. Happy fall a little late everyone! 

Wednesday, December 1, 2010

Applique Pillows - A Beginner Project

These pillows were my first experience with Applique. Be kind! They were fun, and turned out to be a good starter project. If you are looking for a first project, here are some tips:

1. Find a shape with straight lines only, or very few gently curves.
2. Also choose a simple shape, the larger the easier.
3. Always use an iron-on tranfer, like Wonderunder, to make applique easier.
4. Knits and other stretchy fabrics are hard!


Wednesday, November 24, 2010

Scrapbooked Clock Face

This is one of my favorite craft ideas. Simply pop the front off a cheap clock, pull the arms off (they'll go back on - if you're gentle when you pull them off!). Then you can either decorate on the face provided, or use it to trace your own and apply your own numbers, as I did here. I love my Cricut! This one matches Cadence's room. The little bugs are cut directly out of her wallpaper border.

Wednesday, November 17, 2010

Bulletin Board Mail Organizer

This was so fun to design and make. It has room around the edges to use push-pins for notes and such; the ribbon along the bottom has funky paper clips, there is a slot for writing beneath each envelope holder... Mainly I just loved using ribbon and scrapbooking supplies in a sewing project! Since this wasn't for me, I don't know how practical it would up being - but it was fun to make, so that's ok!

Wednesday, November 10, 2010

Jeans Purses


These were somewhat difficult for me, since at this point I had done very little sewing. The basic concept was to cut the top off a pair of little boys jeans, line them, then add handles and a "belt".


In retrospect they look kind of sloppy, but I still love the idea - and they were perfect for the purpose I had in mind. I gave them to the nieces for Christmas :)


I also made little coin purses, which are super easy, even if you've never sewn before. A great starter project, and they can be adapted for SO many different uses. I'll try to do a short tutorial later.

Wednesday, November 3, 2010

Another Decoration

This was Tony's father's day present last year. I was supposed to make a Mama one to match. See how far that got? Um... see the picture of the Mama one? Oh wait... there is no Mama one. Maybe next year. Or the year after that. Or maybe we'll just do a "Grandma" one and save ourselves some trouble.

Wednesday, October 27, 2010

Yummy Dessert

I'm not really sure why I decided this should go on the craft blog. Maybe because they are cute. And easy. And I'm all about cute and easy.


Line muffin pans with foil - either foil cups or just strips crumpled up. Melt chocolate chips, and use a spoon to squish it around and line the foil cups. Refrigerate until chocolate hardens. Follow the directions on package of vanilla instant pudding - spoon in. Add sliced strawberries. And ENJOY!

Wednesday, October 20, 2010

Easiest. Craft. Ever.

1. Cut off the end of a pants leg.
2. Turn it wrong-side out.
3. Stitch across cut off edge.
4. Turn right-side out.
5. If you want, add a button.

I used mine to stash sunscreen and bug spray in the van. What will you use yours for?

Wednesday, October 13, 2010

Paper Bag Scrapbooks

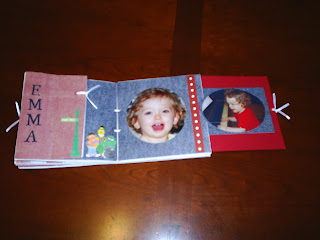
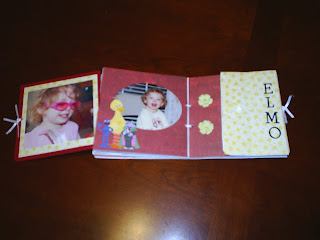
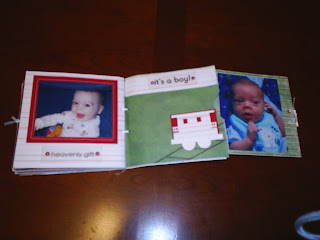
I saw this idea in a craft store right after we got married, and had to try it. You buy white paper lunch bags, cover them with scrapbook paper, and decorate. I made sure each flap could be folded back to reveal more embellishments, and used the open end for a picture insert. They were fun! I did one for all of the younger nieces and nephews... Kristina, I promise I will do something for your boys! Soon! (I didn't have any recent pictures of them at the time... now I have internet, so I do... but I haven't been scrapbooking a lot recently!) Unfortunately, I don't seem to have any pictures of Rylea's. I loved her's, because I got to use my favorite colors. I also can't find pictures of Joshua's. Sigh. Oh well, this will give you the idea :)

Karlea's: 


Emma's:


Jake's: (This was fun because I got to cut out trains - the engine was the best, but again... where are all my pictures?!)


Wednesday, October 6, 2010

It's Finished!

This is Cadence's baby quilt. It's finished - and she's not even two yet!

She loves to snuggle with it, since it is made with chenille. I used a pattern from "Simply Chenille Baby Quilts" by Bonnie Olaveson. I loved the way she put the triangles together - two squares sewn together down the middle, then cut apart. It made it so much easier to work with the chenille.


Yes, the picture above is sideways, and yes, I'm too lazy to switch it - turn your head sideways :) 


Wednesday, September 29, 2010

Accordian Wallet

I've been looking for an accordian wallet for our cash budget, and haven't been able to find one I liked. I finally found this tutorial for sale online, and decided to give it a try. Since there are only five slots, I had to make dividers for my cash, but the dividers are cute too. Yay for digital scrapbooking! This turned out to be really cute and nice, and is working great for me so far. I think I will also try this Coupon Clutch from the Moda Bake Shop, but this is working awesome until I get around to it.


Wednesday, September 15, 2010

Baby Apron and Chef's Hat

This was a fun project! It was one of those rare deals where I didn't have to do any seam ripping or starting over - love it! This will be Cadence's Halloween costume, and then she can wear it anytime while we cook or bake together.

This isn't really a detailed explanation or tutorial, but I did include some general instructions for the apron.


First I traced the shape I wanted on newspaper, then cut it out of nice sturdy fabric. I used canvas so I wouldn't have to line it or anything.


For the ruffle I measured around the outside and cut about a four inch wide piece of fabric double the length measured.

Fold the ruffle in half, wrong sides together, and iron flat. Put your sewing machine on the longest stitch setting. Sew down the side with the raw edges, without backstitching. Be sure to leave a long length of thread at the end.

Pull the back thread to form the ruffle, working it until approximately even. Pin in place around the apron, right sides together, raw edges together, and sew in place.

I combined the binding and straps. This time I used a two and a half inch strip, leaving plenty of excess for the ties. Fold in half and stitch down the length, right sides together. Turn right side out. For the top, iron in half and stitch to either side. Trim off excess. For the side pieces, iron in half just on the section you will use as binding. Stitch this part only, so it is attatched on the front and back. Repeat with the other side.

Trim ties to desired length. Fold ends inside and stitch shut.

I used velcro for the neck tie, and left the back tie plain to just put in a bow. I also added a pocket, but technically you could be done at this point.


Cadence modeling her new apron. It is a little big, but I guess that just means she gets to wear it longer :)
For the chef's hat, I used this tutorial from The Tutorial Phone Book. It was easy to follow. I did have to make it much smaller, since it is designed for an adult head, but that was straightforward. I also used binder clips instead of pins to hold the poofy part in place as I gathered it - so much easier!

Since Cadence will only leave hats on if we are outside, we headed out to take some pictures. Can't wait to wear it some more!